Hardware for Hanging a Cabinet on the Wall
ane / 18
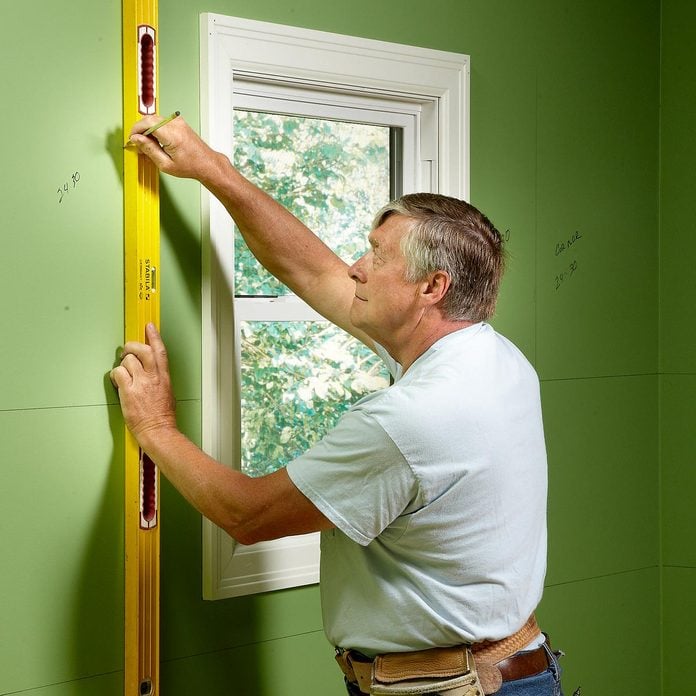
Mark Up the Wall First
A expert cabinet installation starts with a good layout. Mensurate from the highest point in the floor and draw a level line mark the summit of the base cabinets. Measure up nineteen-1/two in. from that line and depict another line for the lesser of the upper cabinets. Characterization the location of the kitchen wall cabinets and appliances on the wall. Draw a vertical line to line up the edge of the first chiffonier to exist installed. Finally, mark the stud locations as yous begin a how to install kitchen cabinets project.
2 / xviii
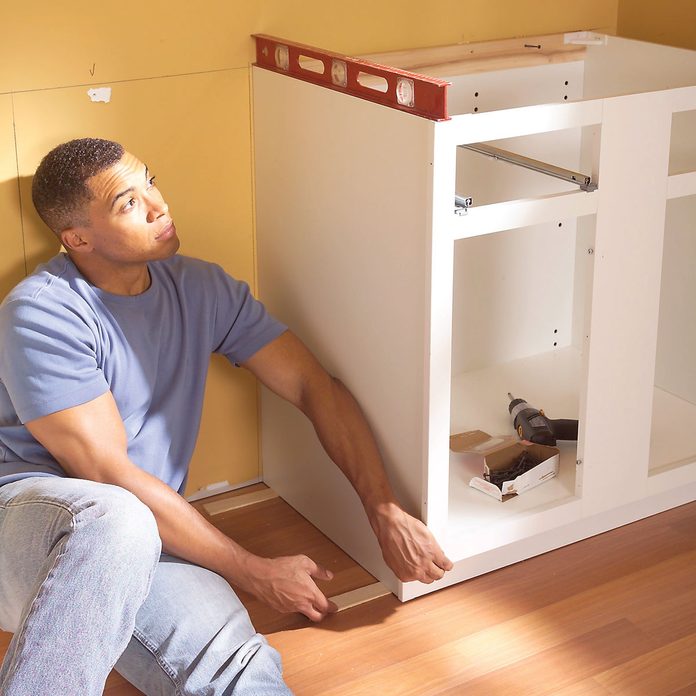
Position the Start Chiffonier
Set the first chiffonier 1/4 in. from the positioning line and shim the base until the top is even with the horizontal line and level from front to dorsum. Bulldoze two-i/two-in. screws through the dorsum into the wall studs to ballast it.
3 / 18
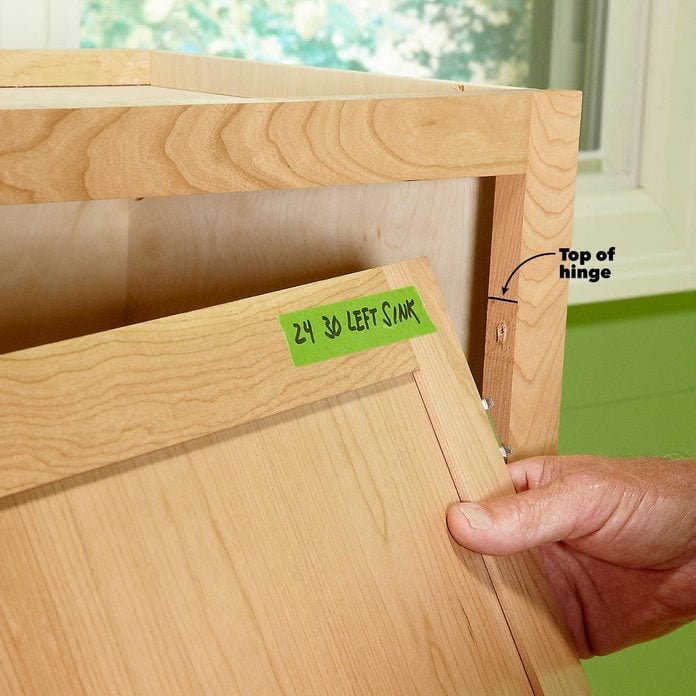
Remove Chiffonier Doors and Drawers
We've all seen painting projects where the hinges and hardware are covered with paint and paint is slopped over drawer interiors. It's tempting to leave the doors in identify for painting as you begin your how to paint kitchen cabinets projection, but you'll get a much neater and more professional person-looking chore past removing them, as well as all the hardware. On many modern cabinets, drawer fronts can be removed from the drawer past bankroll out a few screws. Merely if your drawer fronts are role of the drawer and tin't be removed, use masking tape to cover the drawer sides and bottom if you don't want to pigment them.
4 / 18
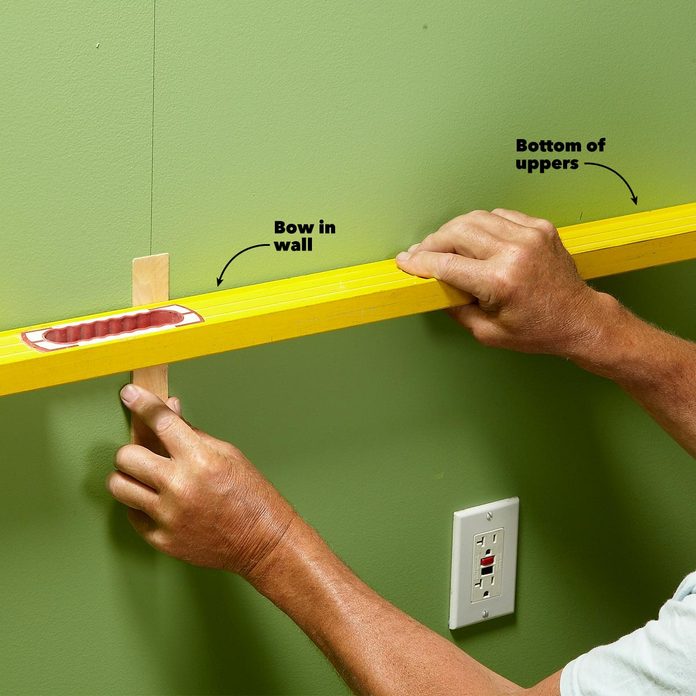
Shim Big Bows
Well-nigh of the time you lot tin can shim the cabinets as you lot go, but if there's an extreme bow in the wall (more than iii/8 in.), shim information technology out before yous hang the chiffonier. If you don't, y'all may accidentally pull the back off the cabinet while fastening it into place. Hold a level across the wall, and slide a shim upwards from the bottom (go in from the top when you're doing the top side) until information technology's snug. And so pin or record information technology into place.
5 / 18
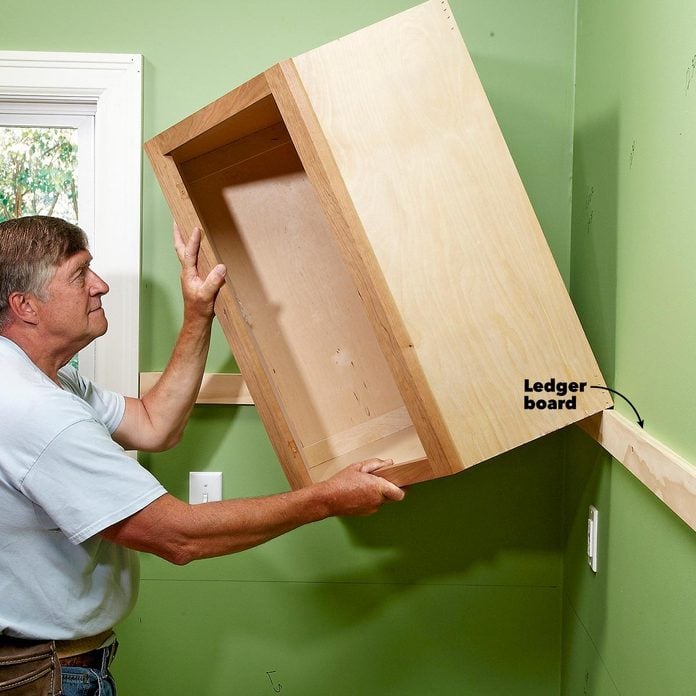
Start With the Upper Cabinets
It'south easier to hang the uppers when you're non hanging manner over the base of operations cabinets. To brainstorm installing top cabinets, rest the uppers on a ledger board—it'll ensure a prissy, straight alignment and eliminate the frustration of holding the cabinets in place while screwing them to the wall. One time your top cabinets are installed, move on to the lesser kitchen cabinets.
vi / xviii
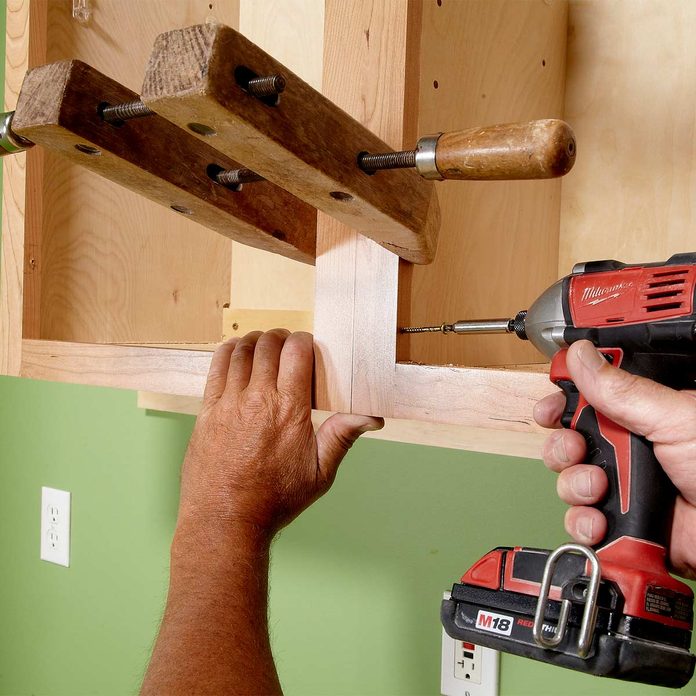
Clench, Drill and Fasten
When connecting two cabinets to each other, line upwardly the face frames and clamp them together. Both cabinets should exist fastened to the wall at this point, but you lot may accept to loosen one chiffonier or the other to get the frames to line up perfectly. Hand-spiral clamps don't flex, and less flex means a tighter grip. Predrill a 1/8-in. hole before screwing them together with a ii-i/2-in. screw. Choose the less noticeable cabinet of the two for drilling and placing the spiral head.
7 / eighteen
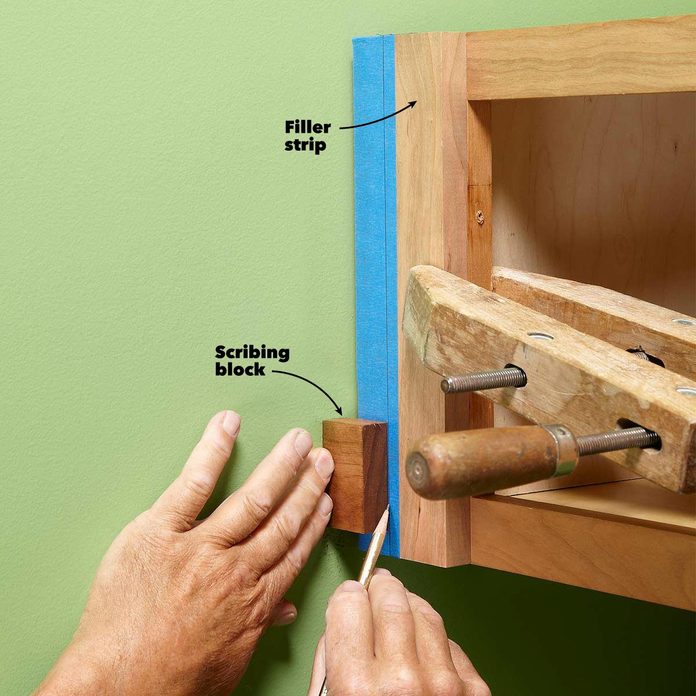
Use a Block of Wood for Scribing
Some other step in how to install cabinets is to find the largest distance between the outside of the cabinet and the wall. Take that measurement and brand a pencil mark on your filler strip (measure over correct to left in this case). Clamp the filler onto the cabinet flush with the inside of the vertical runway. Measure over from the wall to your pencil mark, and make a scribing block that size. Apply your block to trace a pencil line downwards the filler strip. Masking tape on the filler strip helps the pencil line show up better and protects the finish from the saw table.
8 / 18
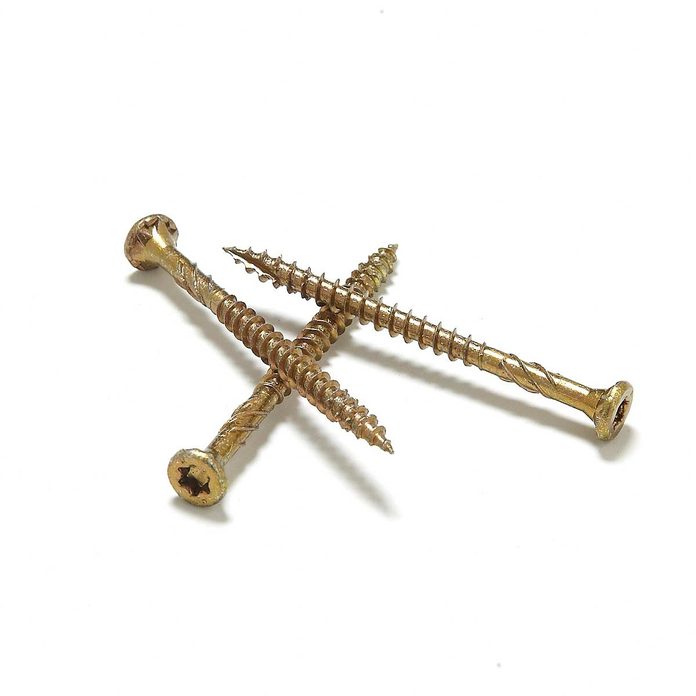
Apply Adept Cabinet Mounting Screws
Many top cabinet makers adopt GRK's R4 self-countersinking spiral as their go-to cabinet mounting screws. You'll pay accordingly, but why scrimp on screws when you're spending thousands of dollars on cabinets? Whatever you do, don't apply drywall screws—they'll just snap off and you'll end up with an extra pigsty. Learn more almost the R4 screws at grkfasteners.com.
9 / xviii
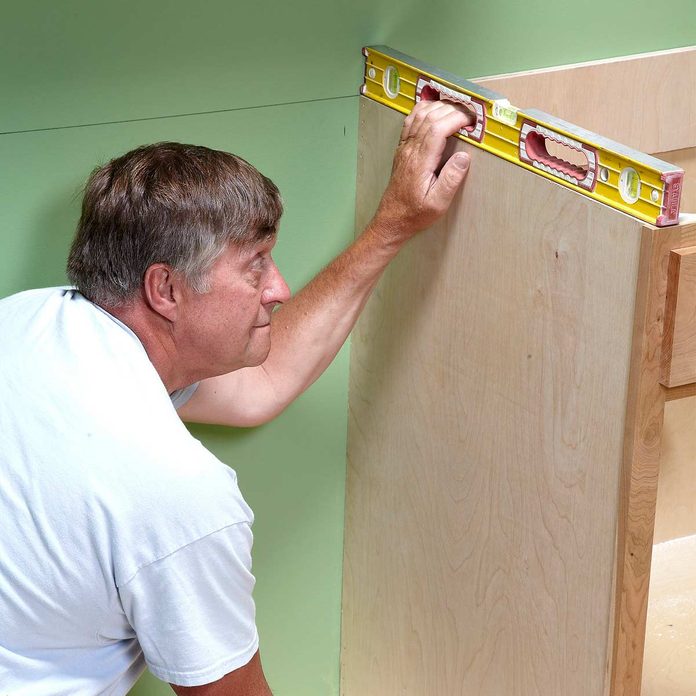
Fasten the Back, So Shim
Line up the base cabinets with the level line on the wall. Spike the back of the cabinets to that line. Once the backs of the cabinets are level, use shims to level the sides. Accept your fourth dimension on this step—nobody likes to have eggs curlicue off a slanted countertop.
10 / xviii

Measure out the Gap
Measure the gap between the wall and the end cabinets at the height and bottom. Add 1/sixteen in. to each measurement and draw a cutting line on the backside of a filler strip.
11 / 18

Cutting the Filler Strip
Clamp the filler strip and cut it at a ten-degree bevel from the backside so the broad edge of the "keeper" piece faces the front.
12 / 18

Fit and Install the Filler
Examination-fit the filler strip and plane the precipitous edge of the bevel until it fits perfectly. Set the strip in place, pre-drill and screw it to the cabinet frame.
xiii / xviii

Employ 2x2s to Secure Cabinets to the Floor for Kitchen Isle Installation
Cabinets that make upwards islands and peninsulas need to be secured to the floor. Join the island cabinets and set them in place. To brainstorm kitchen isle installation, beginning trace an outline of the cabinets on the floor. Screw 2x2s to the floor 1/ii in. on the inside of the line to account for the thickness of the cabinets. Ballast the island cabinets to the 2x2s with screws. If needed, place flooring blocks nether the 2x2s.
14 / 18
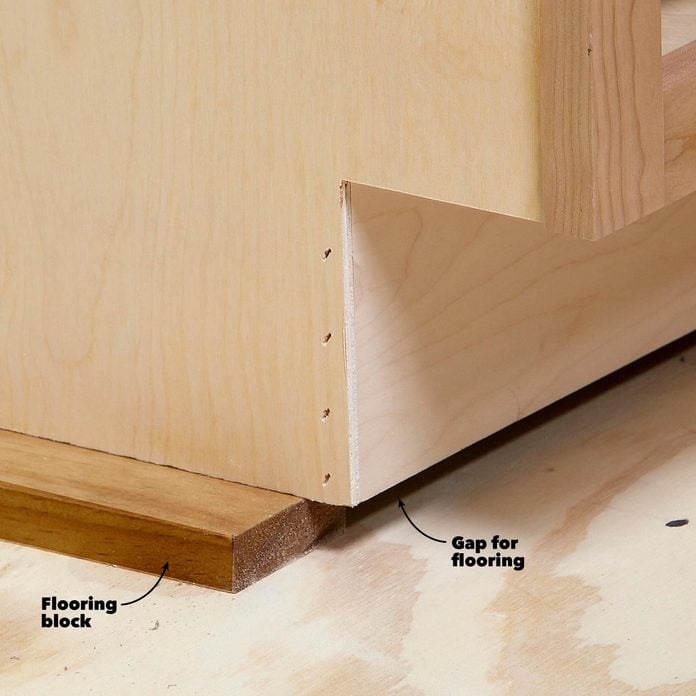
Raise the Cabinets for Flooring
If the kitchen flooring is going to be hardwood or tile, and you're installing information technology afterwards the cabinets, you'll accept to raise the cabinets off the floor or the dishwasher won't fit under the countertop. Use blocks to correspond the finished floor acme, and add those distances to the guide line for the base of operations cabinet tops. Agree the blocks dorsum a bit from the front so the floor can tuck underneath. Your flooring guys will love you for this.
xv / 18
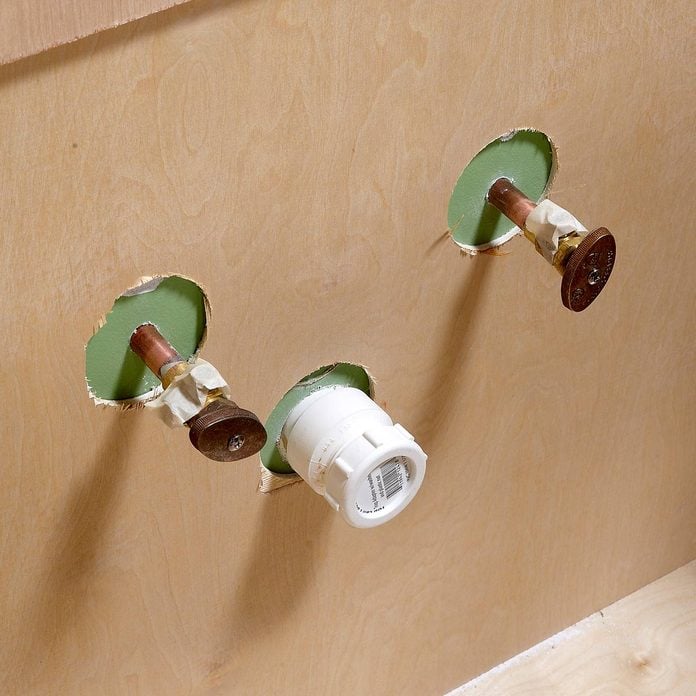
Cut Oversize Holes
Cut verbal size holes for h2o lines and drainpipes might impress your spouse or client, but such precision is likely to result in unnecessary headaches for you. Cutting larger holes makes it easier to slide the cabinet into place and provides wiggle room for minor adjustments. No one's going to detect the oversize holes in one case the cabinet is filled with dish soaps, scrubbers and recycling bins.
16 / 18

Use the Door Rail every bit a Guide
The location of knobs and pulls isn't written in rock, only there are some standard practices. One practiced rule of thumb is to line upwardly a knob with the top of the lesser door rail. If you're installing door pulls, line up the bottom of the pull with the top of the door rails. Always eye them on the door stile.
17 / 18

Temporarily Attach the Hardware
If you're not sure nigh where the knobs and pulls are to exist installed, stick a piece of reusable putty adhesive to the hardware and try out different spots. Mark the i y'all like with a pencil and install the rest of the hardware accordingly. Reusable adhesive is available at hardware and art supply stores.
18 / xviii
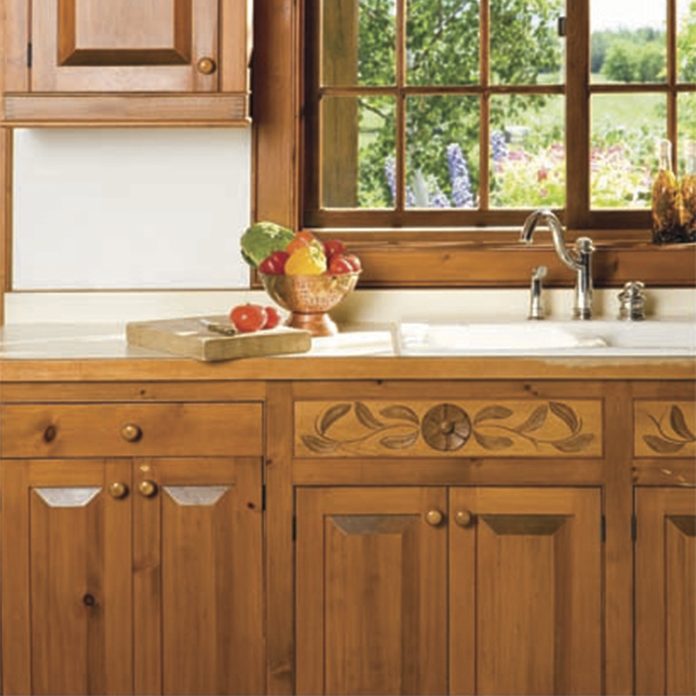
Build Your Own Custom Cabinets
Ever dreamed of building your own traditional kitchen cabinets with solid forest and woods veneers? Join Steve Maxwell in How to Build Kitchen Cabinets to acquire how to plan, build, and install your own custom kitchen cabinets.
Originally Published: April 24, 2019
0 Response to "Hardware for Hanging a Cabinet on the Wall"
Post a Comment